

Install DeepSeek Harness on macOS
Install DSH Desktop, configure a model, choose an empty test folder and verify the connection with one read-only task.
On this page
Download DSH Desktop for macOS, open it, configure a model and select an empty test folder. You do not need Node.js or npx for the packaged app.
Before you start: The official Mac preview installer is Apple Silicon-only. Intel Mac users should follow the CLI section below. Have internet access and an API key for your model provider ready.
Success criteria: DSH opens, the model picker shows an available model, and one read-only task reports the expected dsh-test workspace without an error.
Installing DSH does not include model API credits.

Download and install DSH Desktop for macOS
Use the official preview installer link below.
On an Apple Silicon Mac, open the DMG, drag DeepSeek Harness into Applications, then launch it. Intel Mac users should use the CLI path below.
Download not starting? Open the full Desktop download page →
You can find and open DSH Desktop.

Open DSH Desktop
Open DeepSeek Harness Desktop. Follow its first-run prompts, then add your own model provider credentials.
The DSH main window opens normally.

Configure a model provider
If you use the official DeepSeek API, create a key at DeepSeek API Keys. In DSH, open Settings → Models → DeepSeek, paste the key and save it.
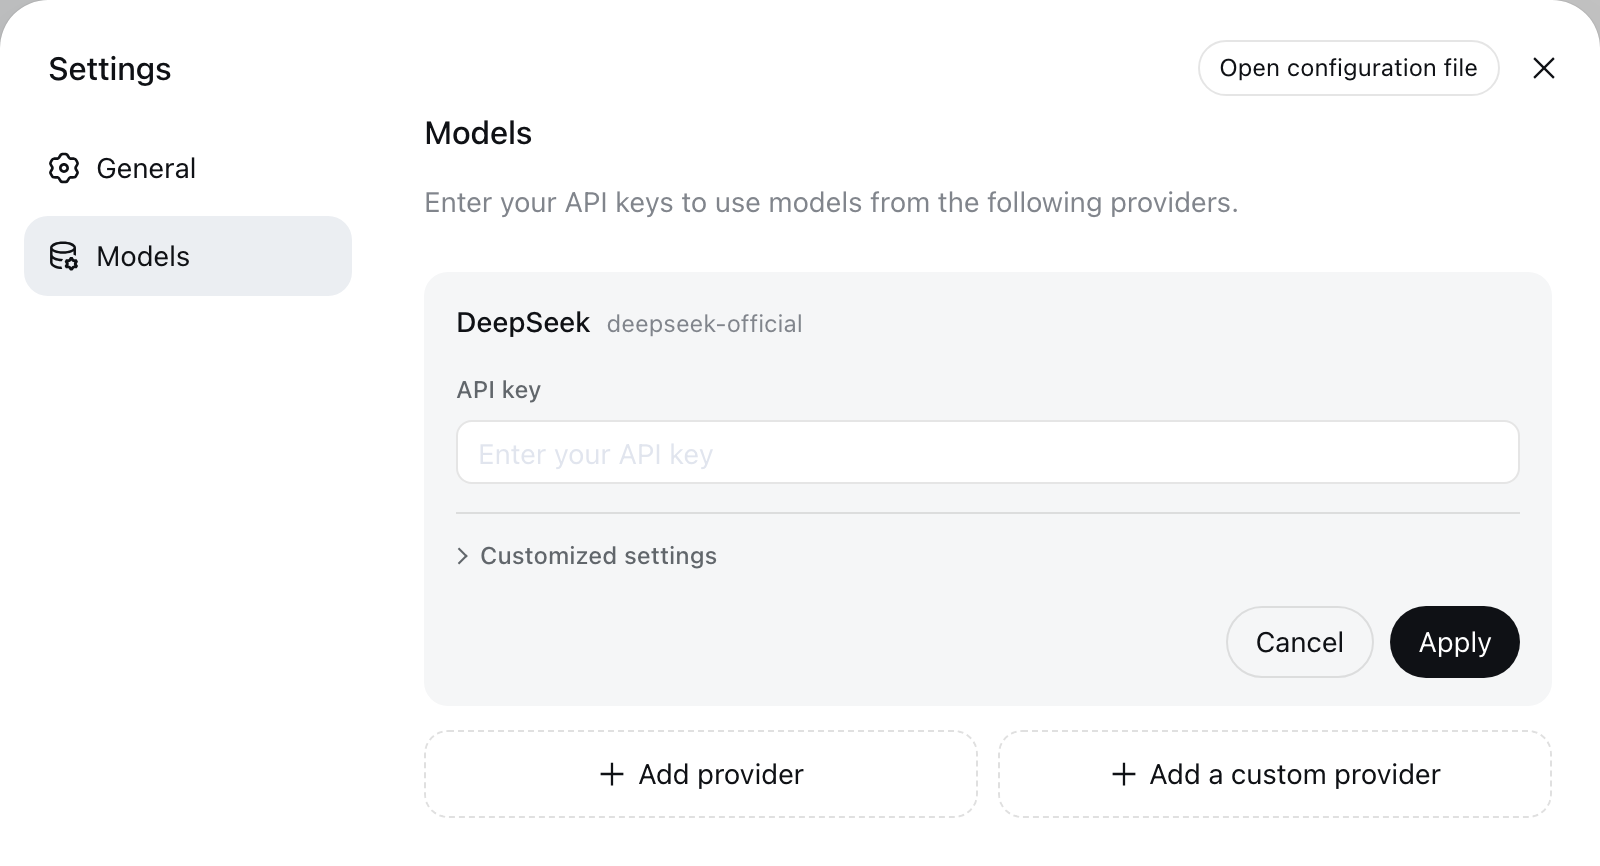
The model picker lets you select a model from the configured provider.

Choose an empty test folder
Create a folder named dsh-test, then choose it with Choose workspace. Do not start with a production repository or a folder that contains secrets.
The selected workspace is ~/dsh-test or the equivalent dsh-test folder you created.

Verify the setup with one read-only task
Send this prompt:
① the model replies; ② the reported workspace is your dsh-test folder; ③ the file list matches what is on disk; ④ no error is shown.
If something fails, find the matching symptom
node or npm is not found
Close Terminal and reopen it. If the command still fails, repair the Node.js installation. Desktop users do not need Node.js for the packaged app.
npm reports an unsupported Node engine
Run node --version. Upstream declares ^22.19.0 || >=24.0.0; this guide recommends ^22.19.0 || >=24.2.0 because released DSH packages have a known silent-exit regression when used with Node 24.0/24.1.
npx looks stuck on first launch
The first run may be downloading the package. If npm asks to install @deepseek-ai/dsh, confirm the package name before accepting.
EADDRINUSE on port 3080
Run lsof -nP -iTCP:3080 -sTCP:LISTEN, stop the stale process, or launch DSH with --port 13080.
MISSING_CREDENTIAL
Open Settings → Models and save the provider credential again.
Command-line setup (advanced)
Use this path only if you specifically want the CLI or local Web UI outside DSH Desktop.
Install Node.js from the official Node.js downloads page, then use the recommended range below.
- Install Node.js in the recommended range
^22.19.0 || >=24.2.0. - Press Command + Space, type Terminal, then press Return.
- Run
node --versionandnpm --version. - Run
npx @deepseek-ai/dsh web. - Open
http://127.0.0.1:3080, then continue from Step 3 above.
Optional: use DSH from a chat platform
Do this only after the local setup works. Pick one platform you already use; you do not need to configure all of them.
Telegram
Use a Telegram bot as a remote entry point for DSH tasks.
- Connection
- Create a bot with BotFather → add the token
Discord
Use DSH from an existing Discord server or channel.
- Connection
- Create a Discord bot → add the token and permissions
Connect the community dsh-im route through an iLink QR code.
- Connection
- Scan the iLink QR code
Start with a linked-device flow and test in your own chat.
- Connection
- Link a WhatsApp Web device
Feishu / Lark
Use DSH in direct messages or team channels.
- Connection
- Scan to create, or add App ID / App Secret
Official Desktop documentation · Desktop downloads. The CLI supports Node ^22.19.0 || >=24.0.0; use ^22.19.0 || >=24.2.0 to avoid the reported Node 24.0/24.1 silent-exit issue.